Just got home from my second craft fair–my friend Laura Gordon and I decided to share a booth at the Statesboro Farmer’s Market and Craft Fair.  Im so glad we did!!  Setting up and transporting everything is so much easier with another person and its great to have a friend to chat with when things are slow.  Her photographs are gorgeous and the cows and chickens were a hit!!  As for me, I sold out of shot glasses (who would have thought in Statesboro…haha)  And also got requests for berry bowls, wind chimes, butter dishes and salt and pepper shakers!  Ill be a busy girl for the next craft fair!

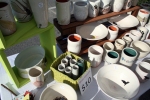
Here are a few pictures of our set-up:

As you can see, Im taking over the shelves…there are even more bowls on there today!  So I’m really loving the red clay/white terra sig combo…wish I would have switched earlier!   


Time to glaze!

Just wanted to update everyone on what Ive been doing around the studio–been workin on making inks for screenprinting onto clay.  I have tried several different formulas and finally found the one that works the best!

This is not very scientific, so if you try it out, some tweaking may be in order to get the consistency and opaqueness you like.

 Materials:

Mason Stains or Oxides (In this example, I used yellow ochre oxide)

Transparent Screenprinting Base (Acrylic) OR water based wallpaper paste

Low fire glaze–about 2 tbsp. (Store bought works great)

Steps:

1.  Fill container with transparent base, leaving about 2-3 inches from the top.

2.  Measure out your mason stain or oxide—For this ink, i wanted some transparency, so I added about 2 tablespoons of yellow ochre.  Mix thoroughly.   Add more for a more opaque ink.  Also, do a scrape test on a piece of paper to see the opacity–simply put a small amount on a scraper and run it across the paper…if it is too thin, add more stain.

3.  Add about 2 tbsp. of storebought lowfire clear glaze.  Mix thoroughly.  This is very important–the glaze fuzes the ink to the clay during the bisque.  Without the glaze, the ink will rub off.

4.  Now the fun/tedious part–screening!  I pushed the ink through a 40 mesh screen, then 60, and finally 80.  This takes some time, but will make your ink the right consistency with no clumps.  Your screen will get clogged when you print if you do not do this step!

If anyone out there has any other recipes or ideas, feel free to contact me.  🙂

I ran across Jeff Campana’s work while surfing the internet recently and just had to share his beautiful work!!  He disects his work and then reassembles them back together, creating a puzzle like effect.  I just love how the pieces fit back together and the glaze pools in the cracks.  You can check out his blog where he reveals his process at http://www.jeffcampana.com.

Here are a few examples of his work:

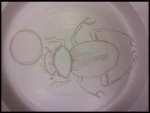
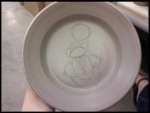
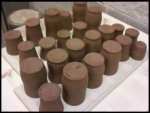
Today, I was busy trimming cups and drawing.  Snapped a few pics with my phone, sorry for the low quality! 

So I thought I needed a blog to keep a record of things going on in the studio…and of course share processes and techniques Im trying!  I primarily throw with white porcelain, but this week, I made a drastic switch to low-fire redware.  Although this seems daunting, I am newly energized and excited to see where my work will go.  

I’m also busy working on transfer techniques and stenciling to add imagery to my work.  I will post images as soon as I get the camera in the studio with me.   Just gotta get those images together…

 Also, noteworthy, I have an interview with Odyssey next week for a resident position, wish me luck!!

Welcome to WordPress.com. This is your first post. Edit or delete it and start blogging!

wordpress visitors

Calendar

April 2024
M T W T F S S
1234567
891011121314
15161718192021
22232425262728
2930